
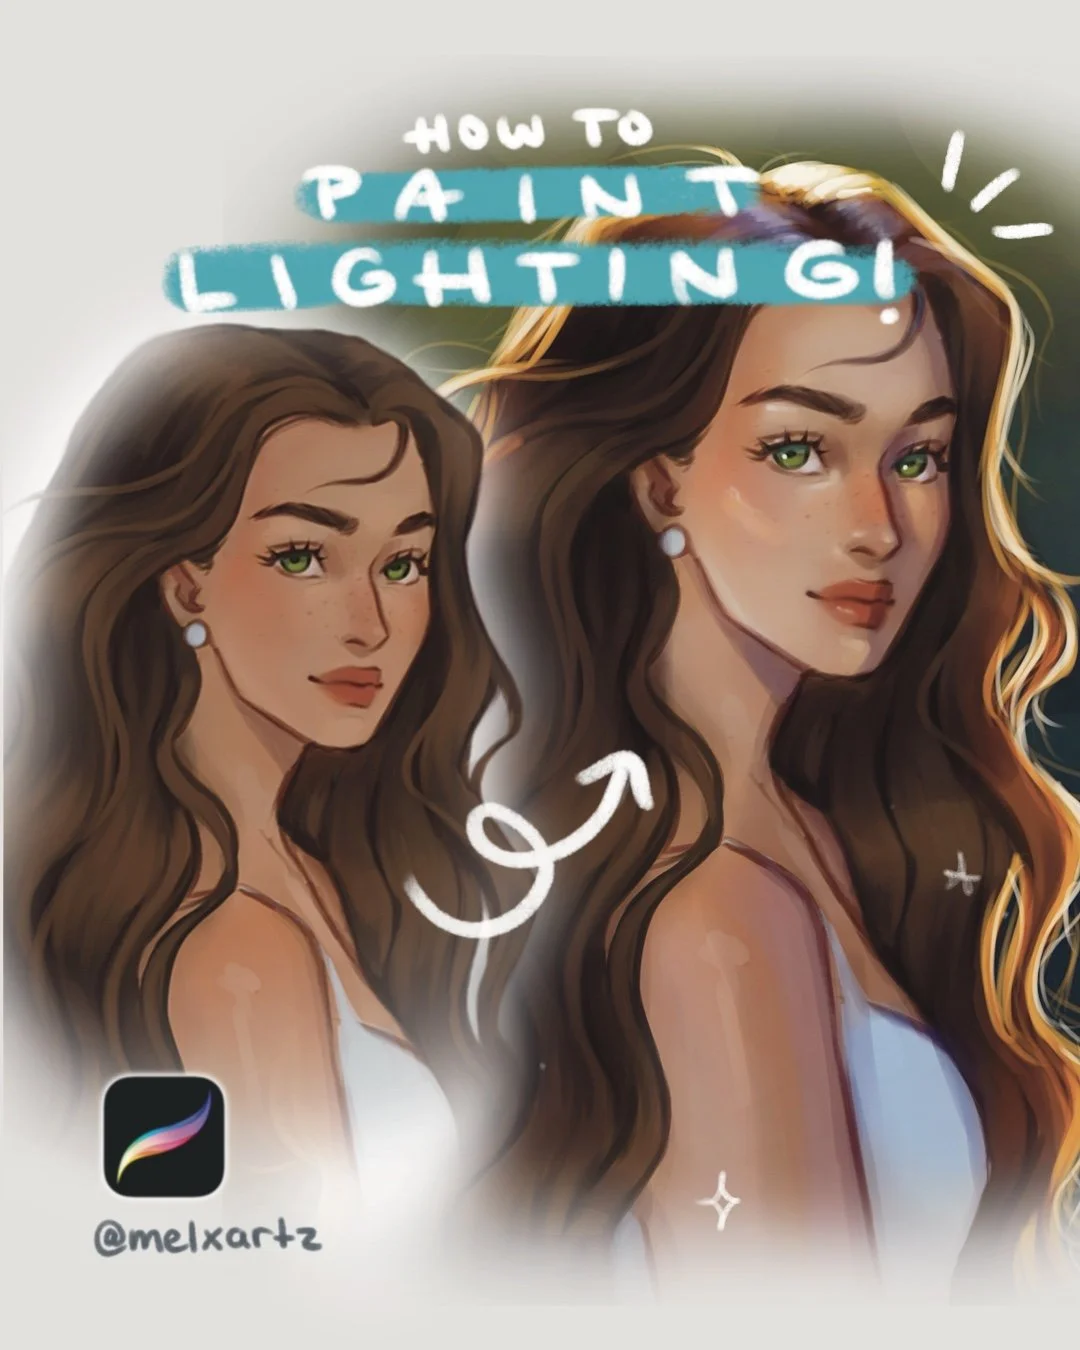
How to paint Dreamy Backlighting
Painting lighting is easier than you think💡
Master backlighting for soft, glowing sunlight effects — perfect for portraits and studies where the sun is shining from behind your character.
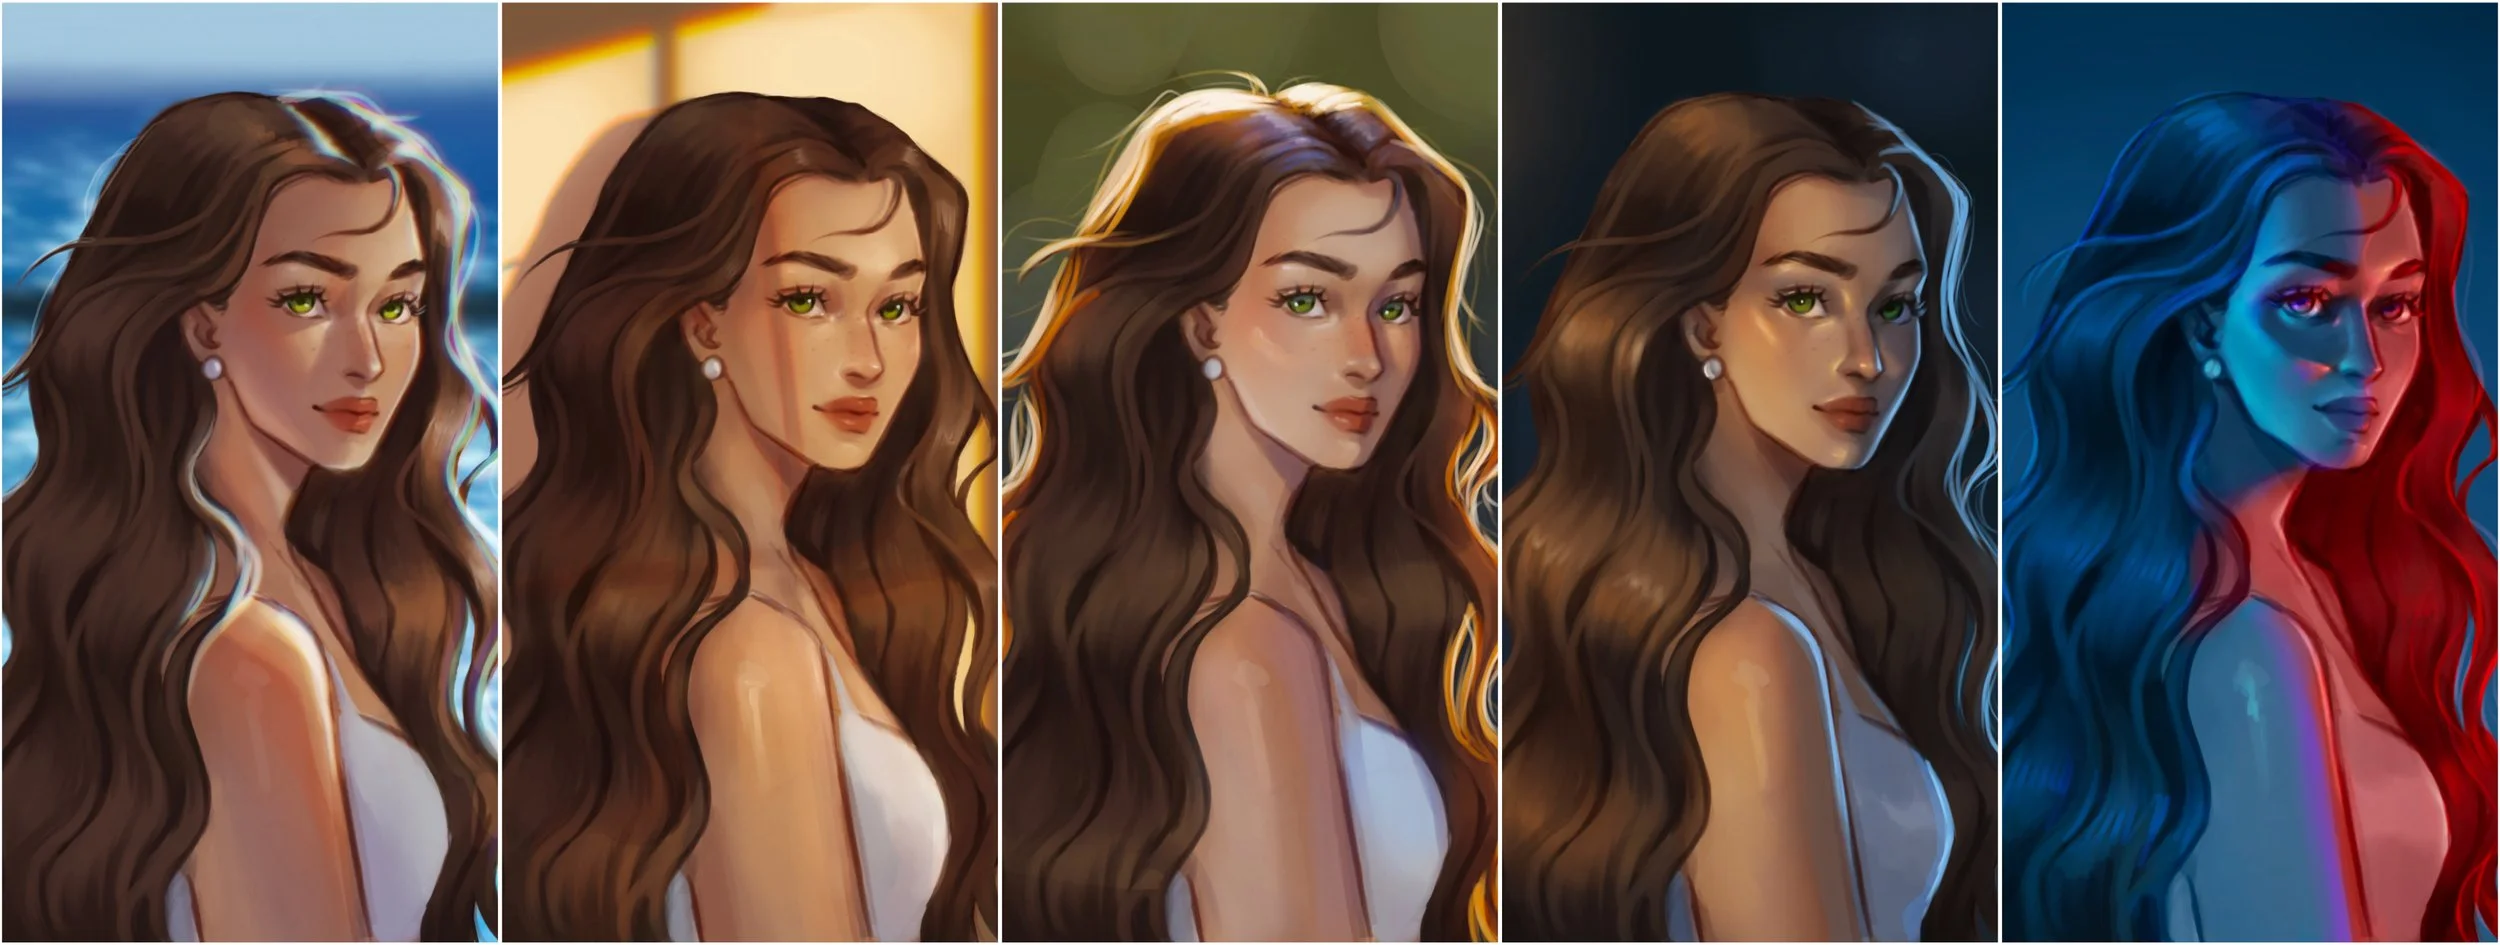
When the sunlight is coming from behind your character, it creates that dreamy, glowing look — one of my favorite lighting scenarios. It’s soft, warm, and atmospheric, but it also requires a good balance between light, shadow, and reflected colors.
Here’s how I painted it step by step!
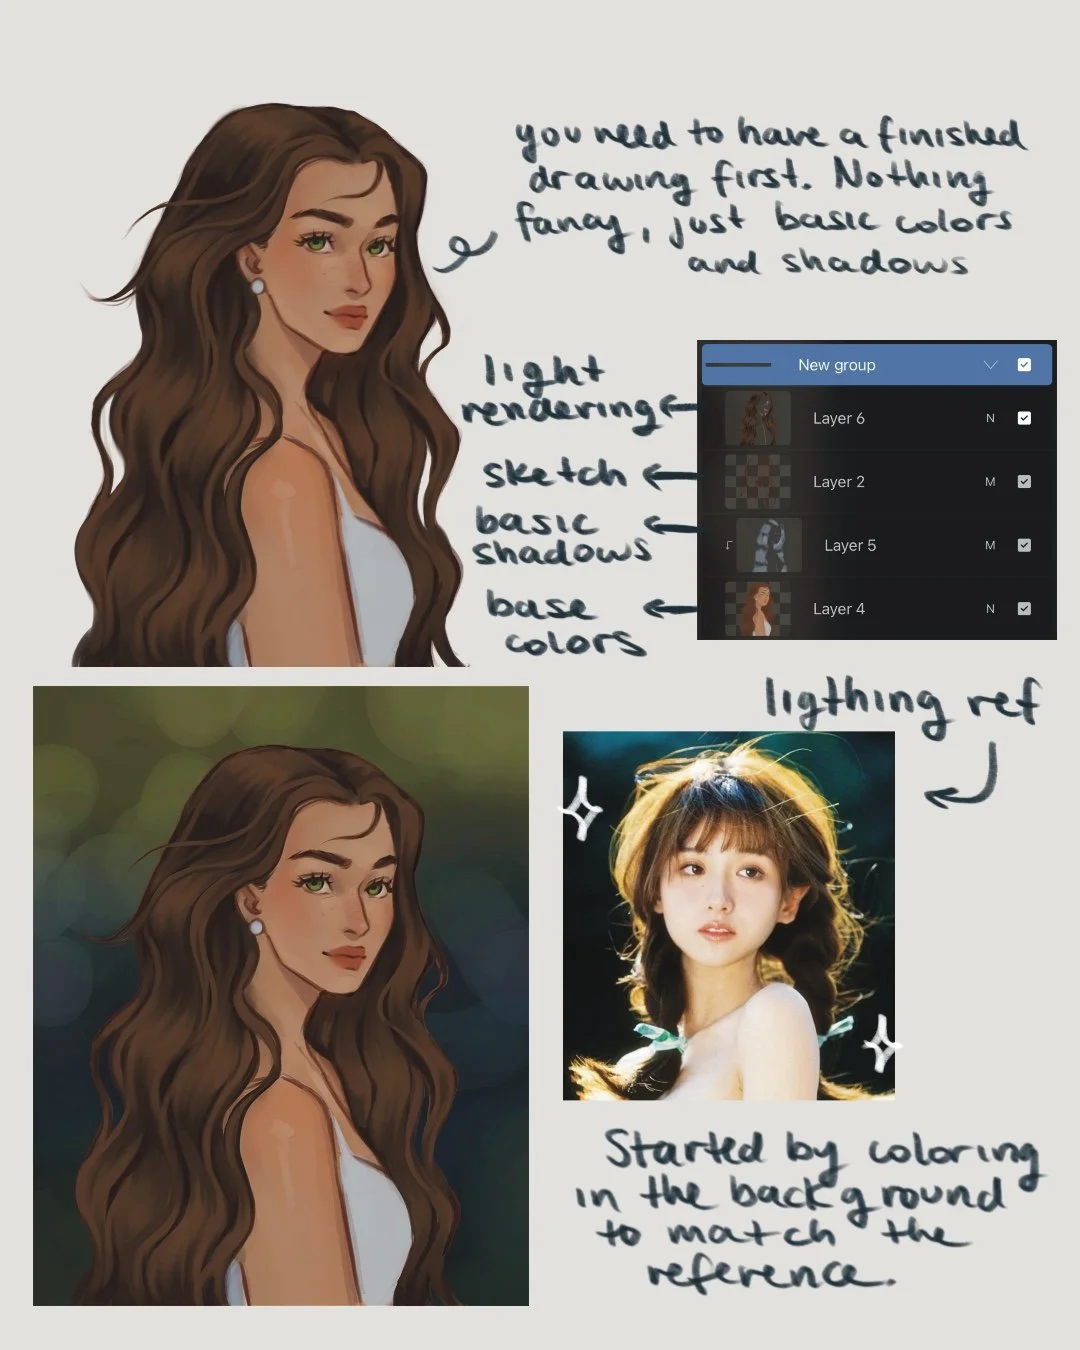
1. Start with your colored base
Begin with your finished drawing that already has basic shadows and rendering — as if the scene were under a cloudy sky. No harsh light, no strong contrast yet. This will be your neutral base before adding sunlight.
Tip: I always keep my reference image nearby, especially when doing a lighting study.
It helps me stay consistent with color temperature, direction, and intensity throughout the process.
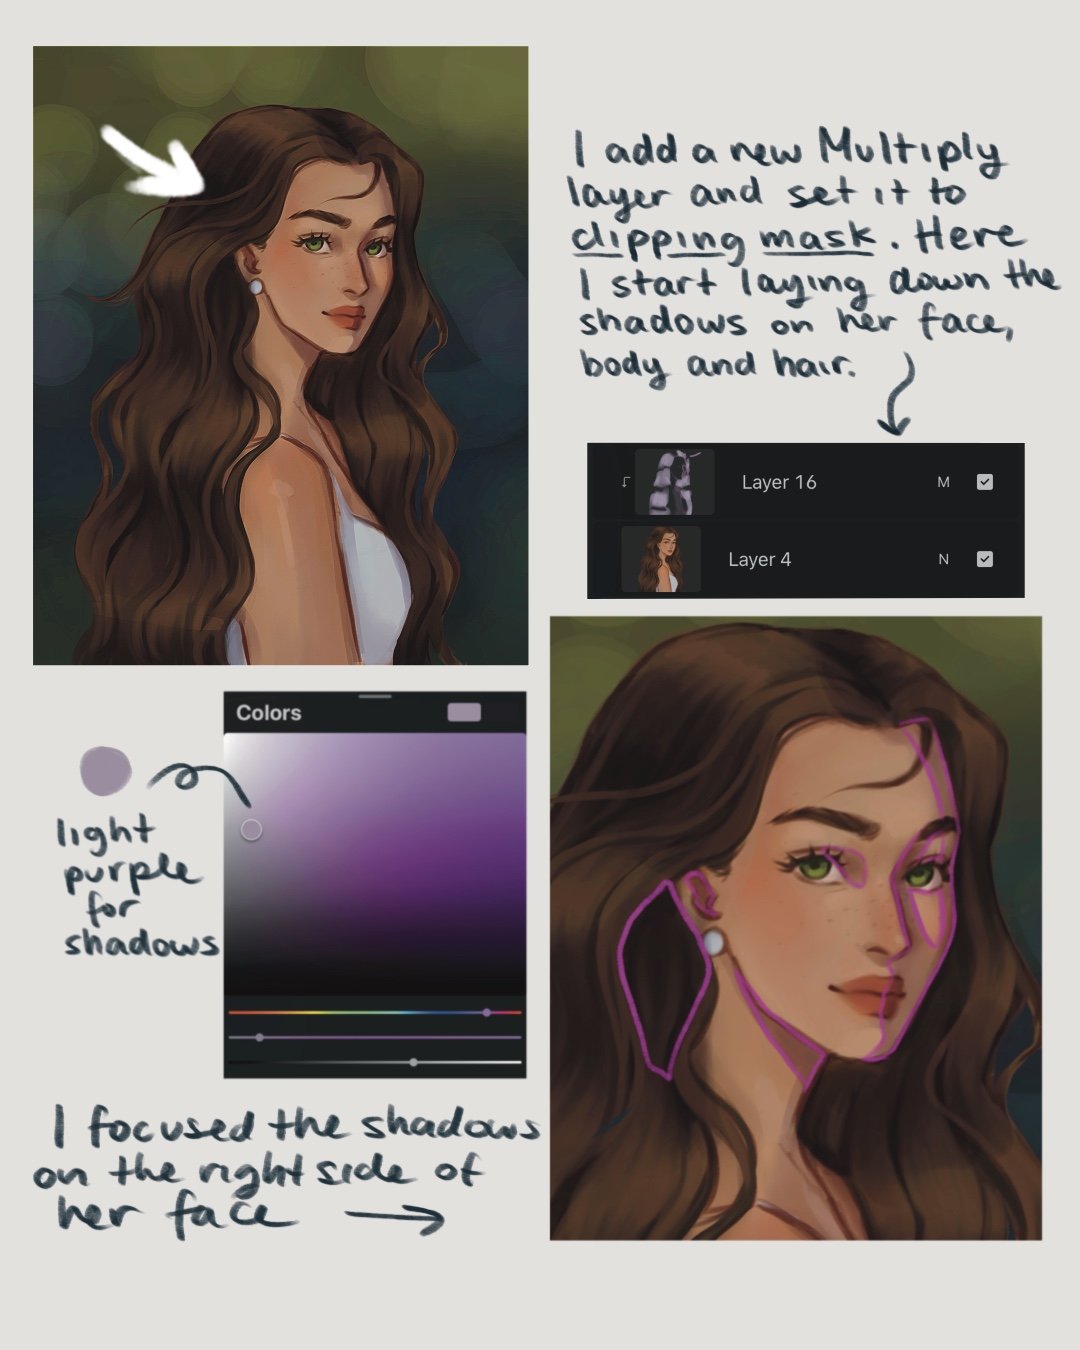
2. Add Soft Shadows
Create a new Multiply layer and set it to Clipping Mask, here softly darken the areas away from the sun — for me, that was the right side of her face.
This step sets the depth before introducing any glow.
Keep your brush opacity at around 50–60% and build up your shadows.
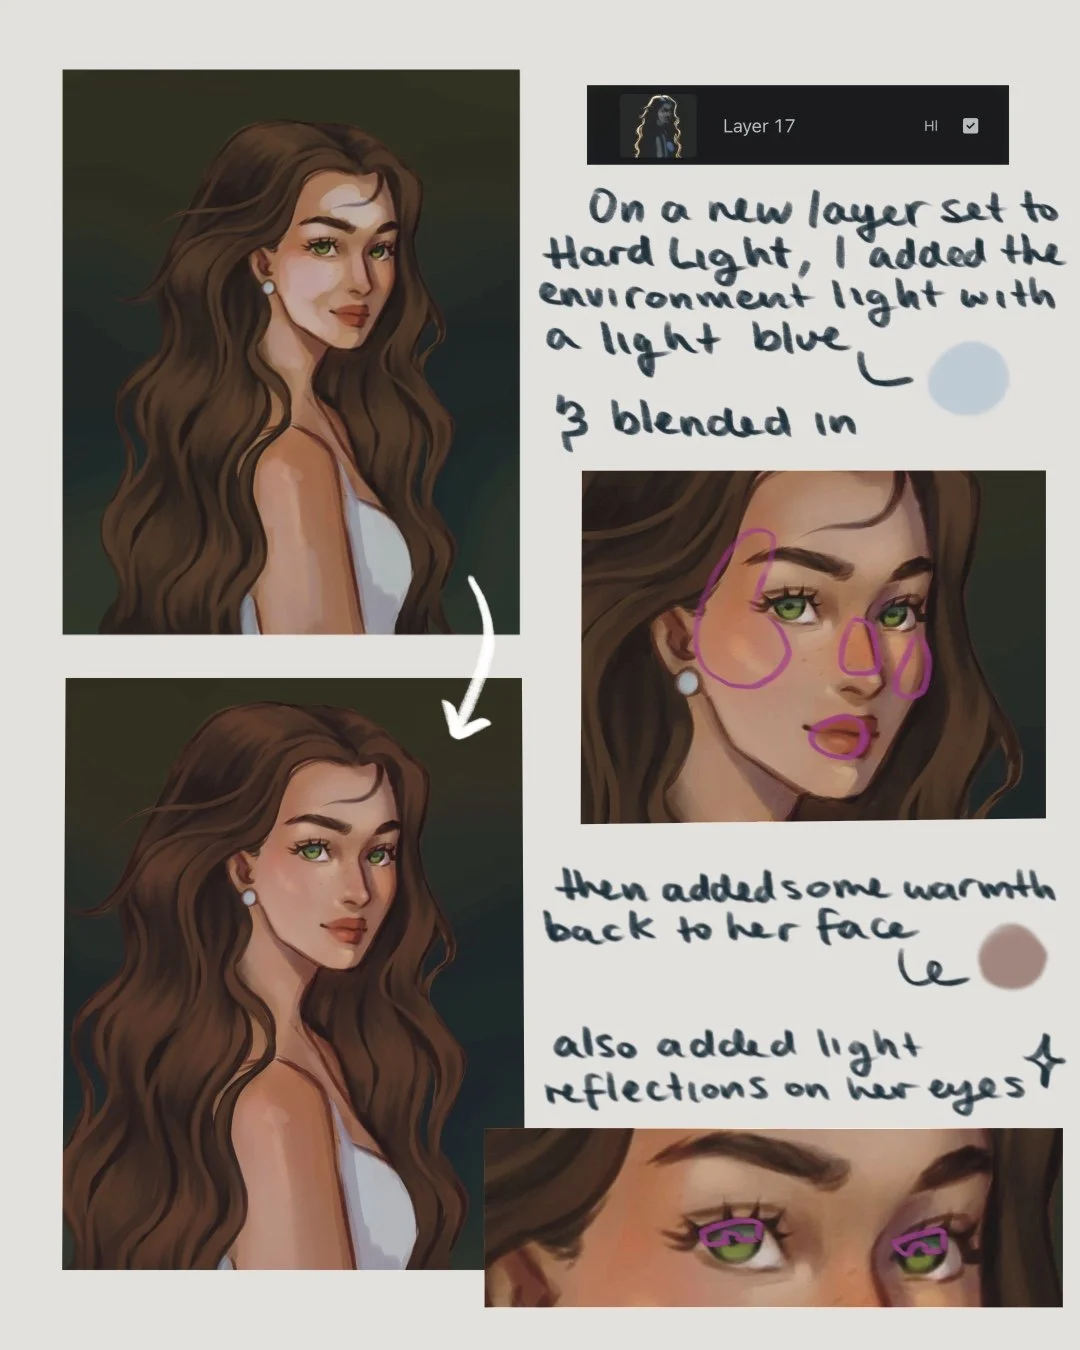
3. Adding Light
Create a new layer and set it to Hard Light. On this layer I will be adding the light coming from the environment.
How I did it:
Use a light blue tone to paint the sky’s reflected light on her skin.
Gaussian Blur that layer slightly to soften the lighting.
Add warmth back to her face in areas like — cheeks, nose, and lips — for a more natural look.
Adding a soft pass of the light blue to the top of her eyes gives it a really soft and glossy look.
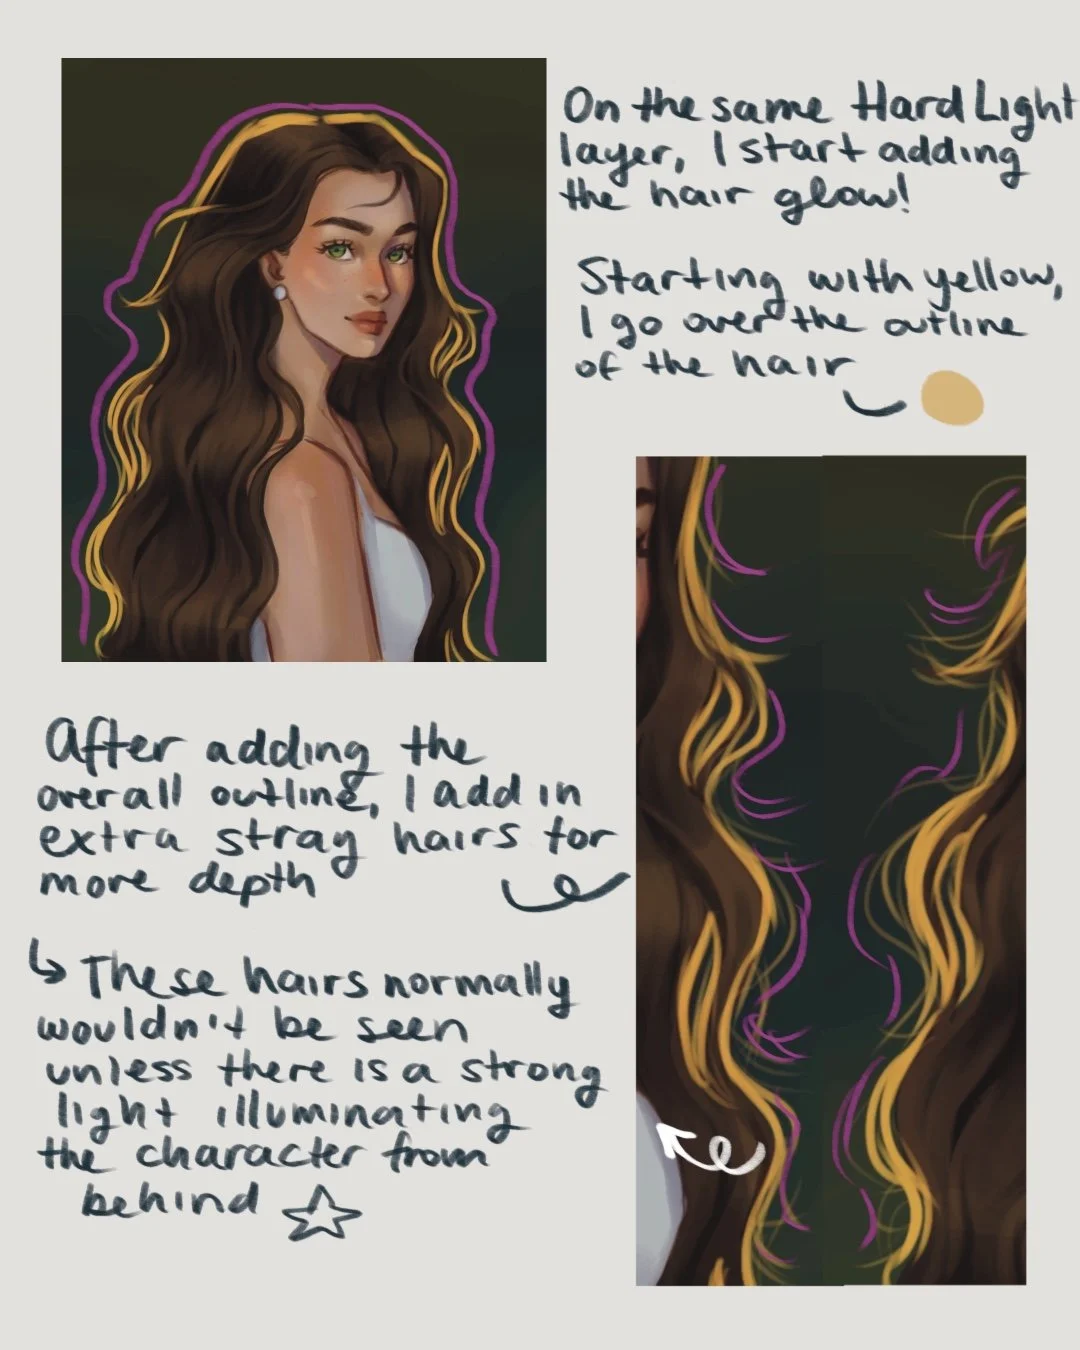
4. Paint the Glowing Hair
Now it’s time for that dreamy sunlight effect!
Stay on your Hard Light layer (or create a fresh one if needed).
Colors I used:
💛 Yellow for the main glow.
🧡 Orange for the transition.
🤍 White for the brightest highlights.
Build the glow gradually — start soft, then layer brighter, bolder strokes.
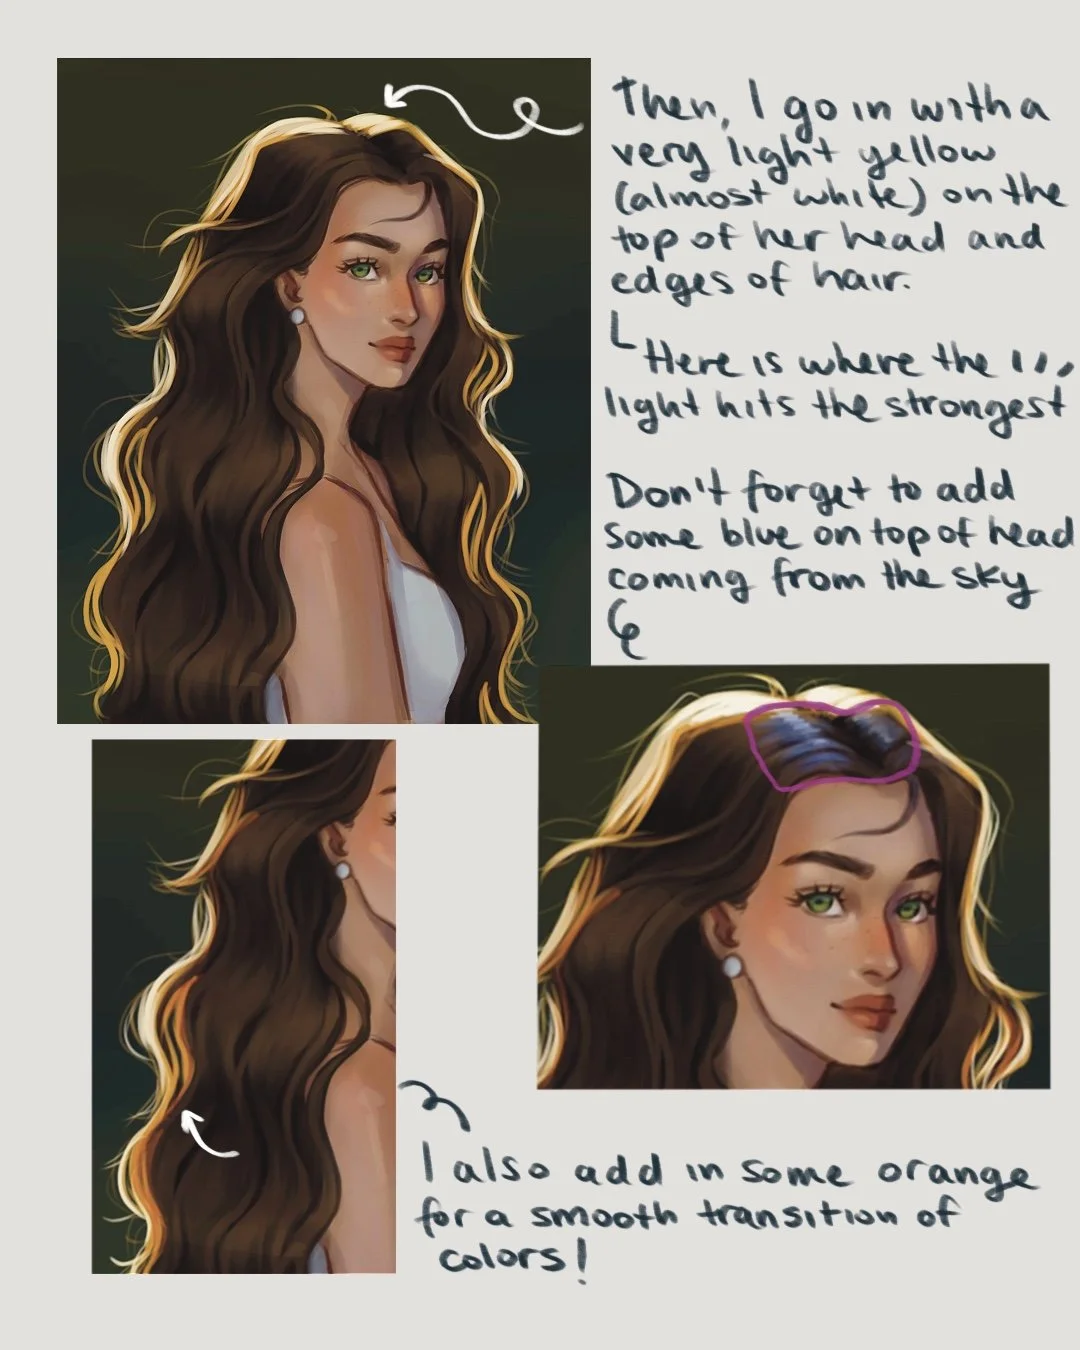
This creates that glowing, backlit effect (and a bit of subsurface scattering — the light shining through those fine strands of hair).
Tip: Add a touch of blue near the top of the head to show reflected sky light — it creates a nice color contrast.
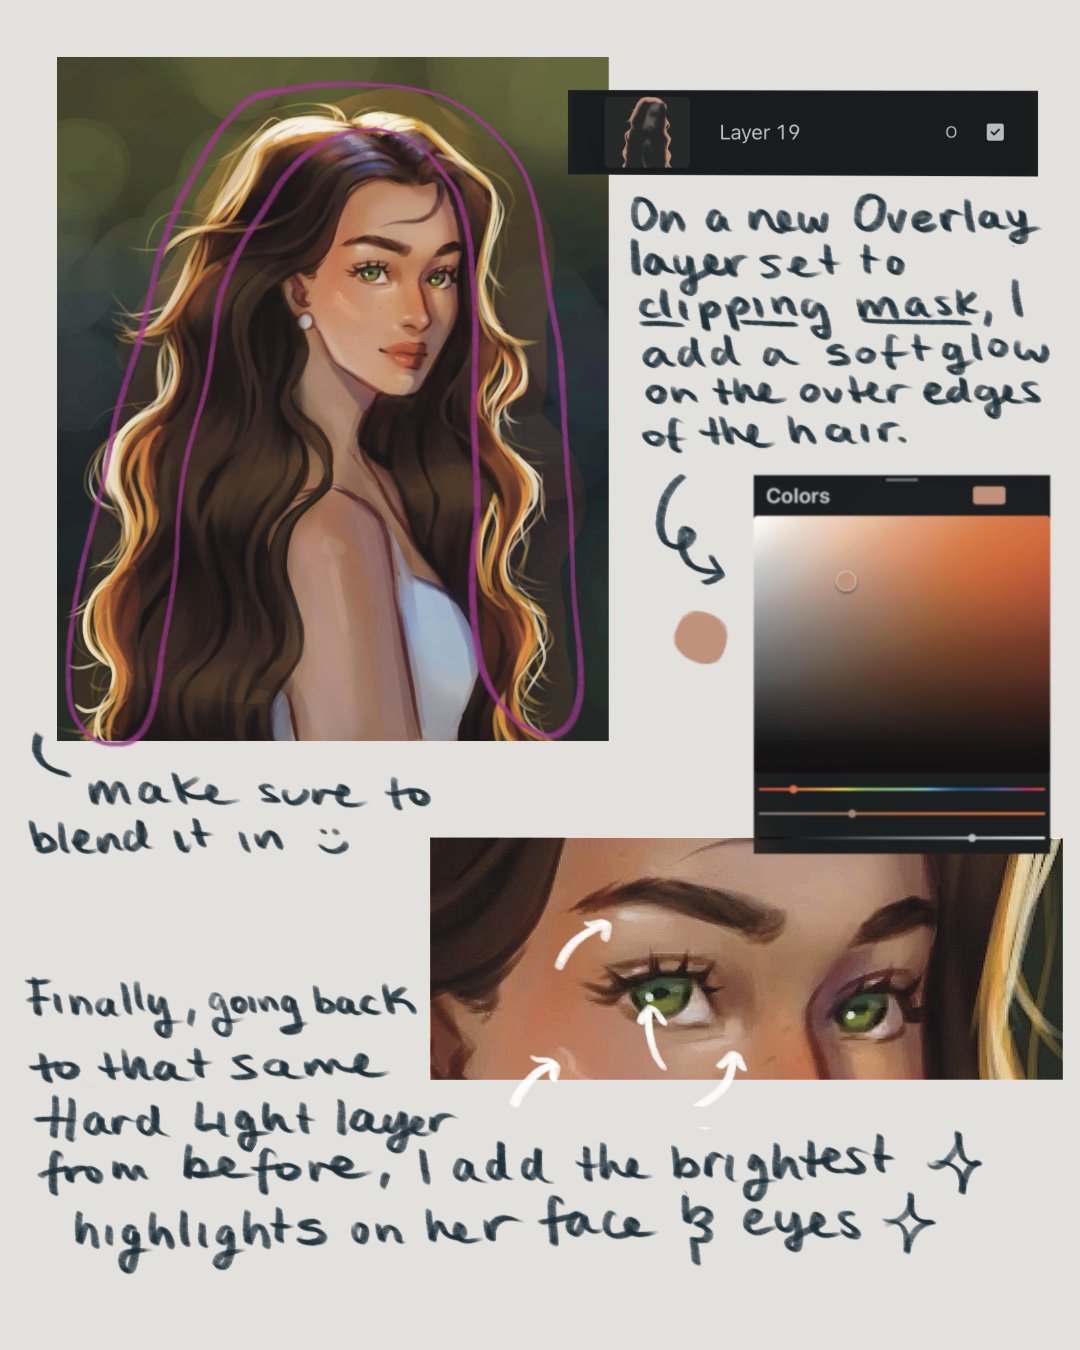
5. Add final glow
On a new Overlay layer placed beneath your highlights, softly brush around the hair using a warm orange tone. This gives that sunlit haze and softens transitions between the light and shadow.
I also brushed a little of the same orange onto the skin for added warmth, then lowered the opacity until it felt just right.
Don’t forget to refine the eye highlights to give them more life!

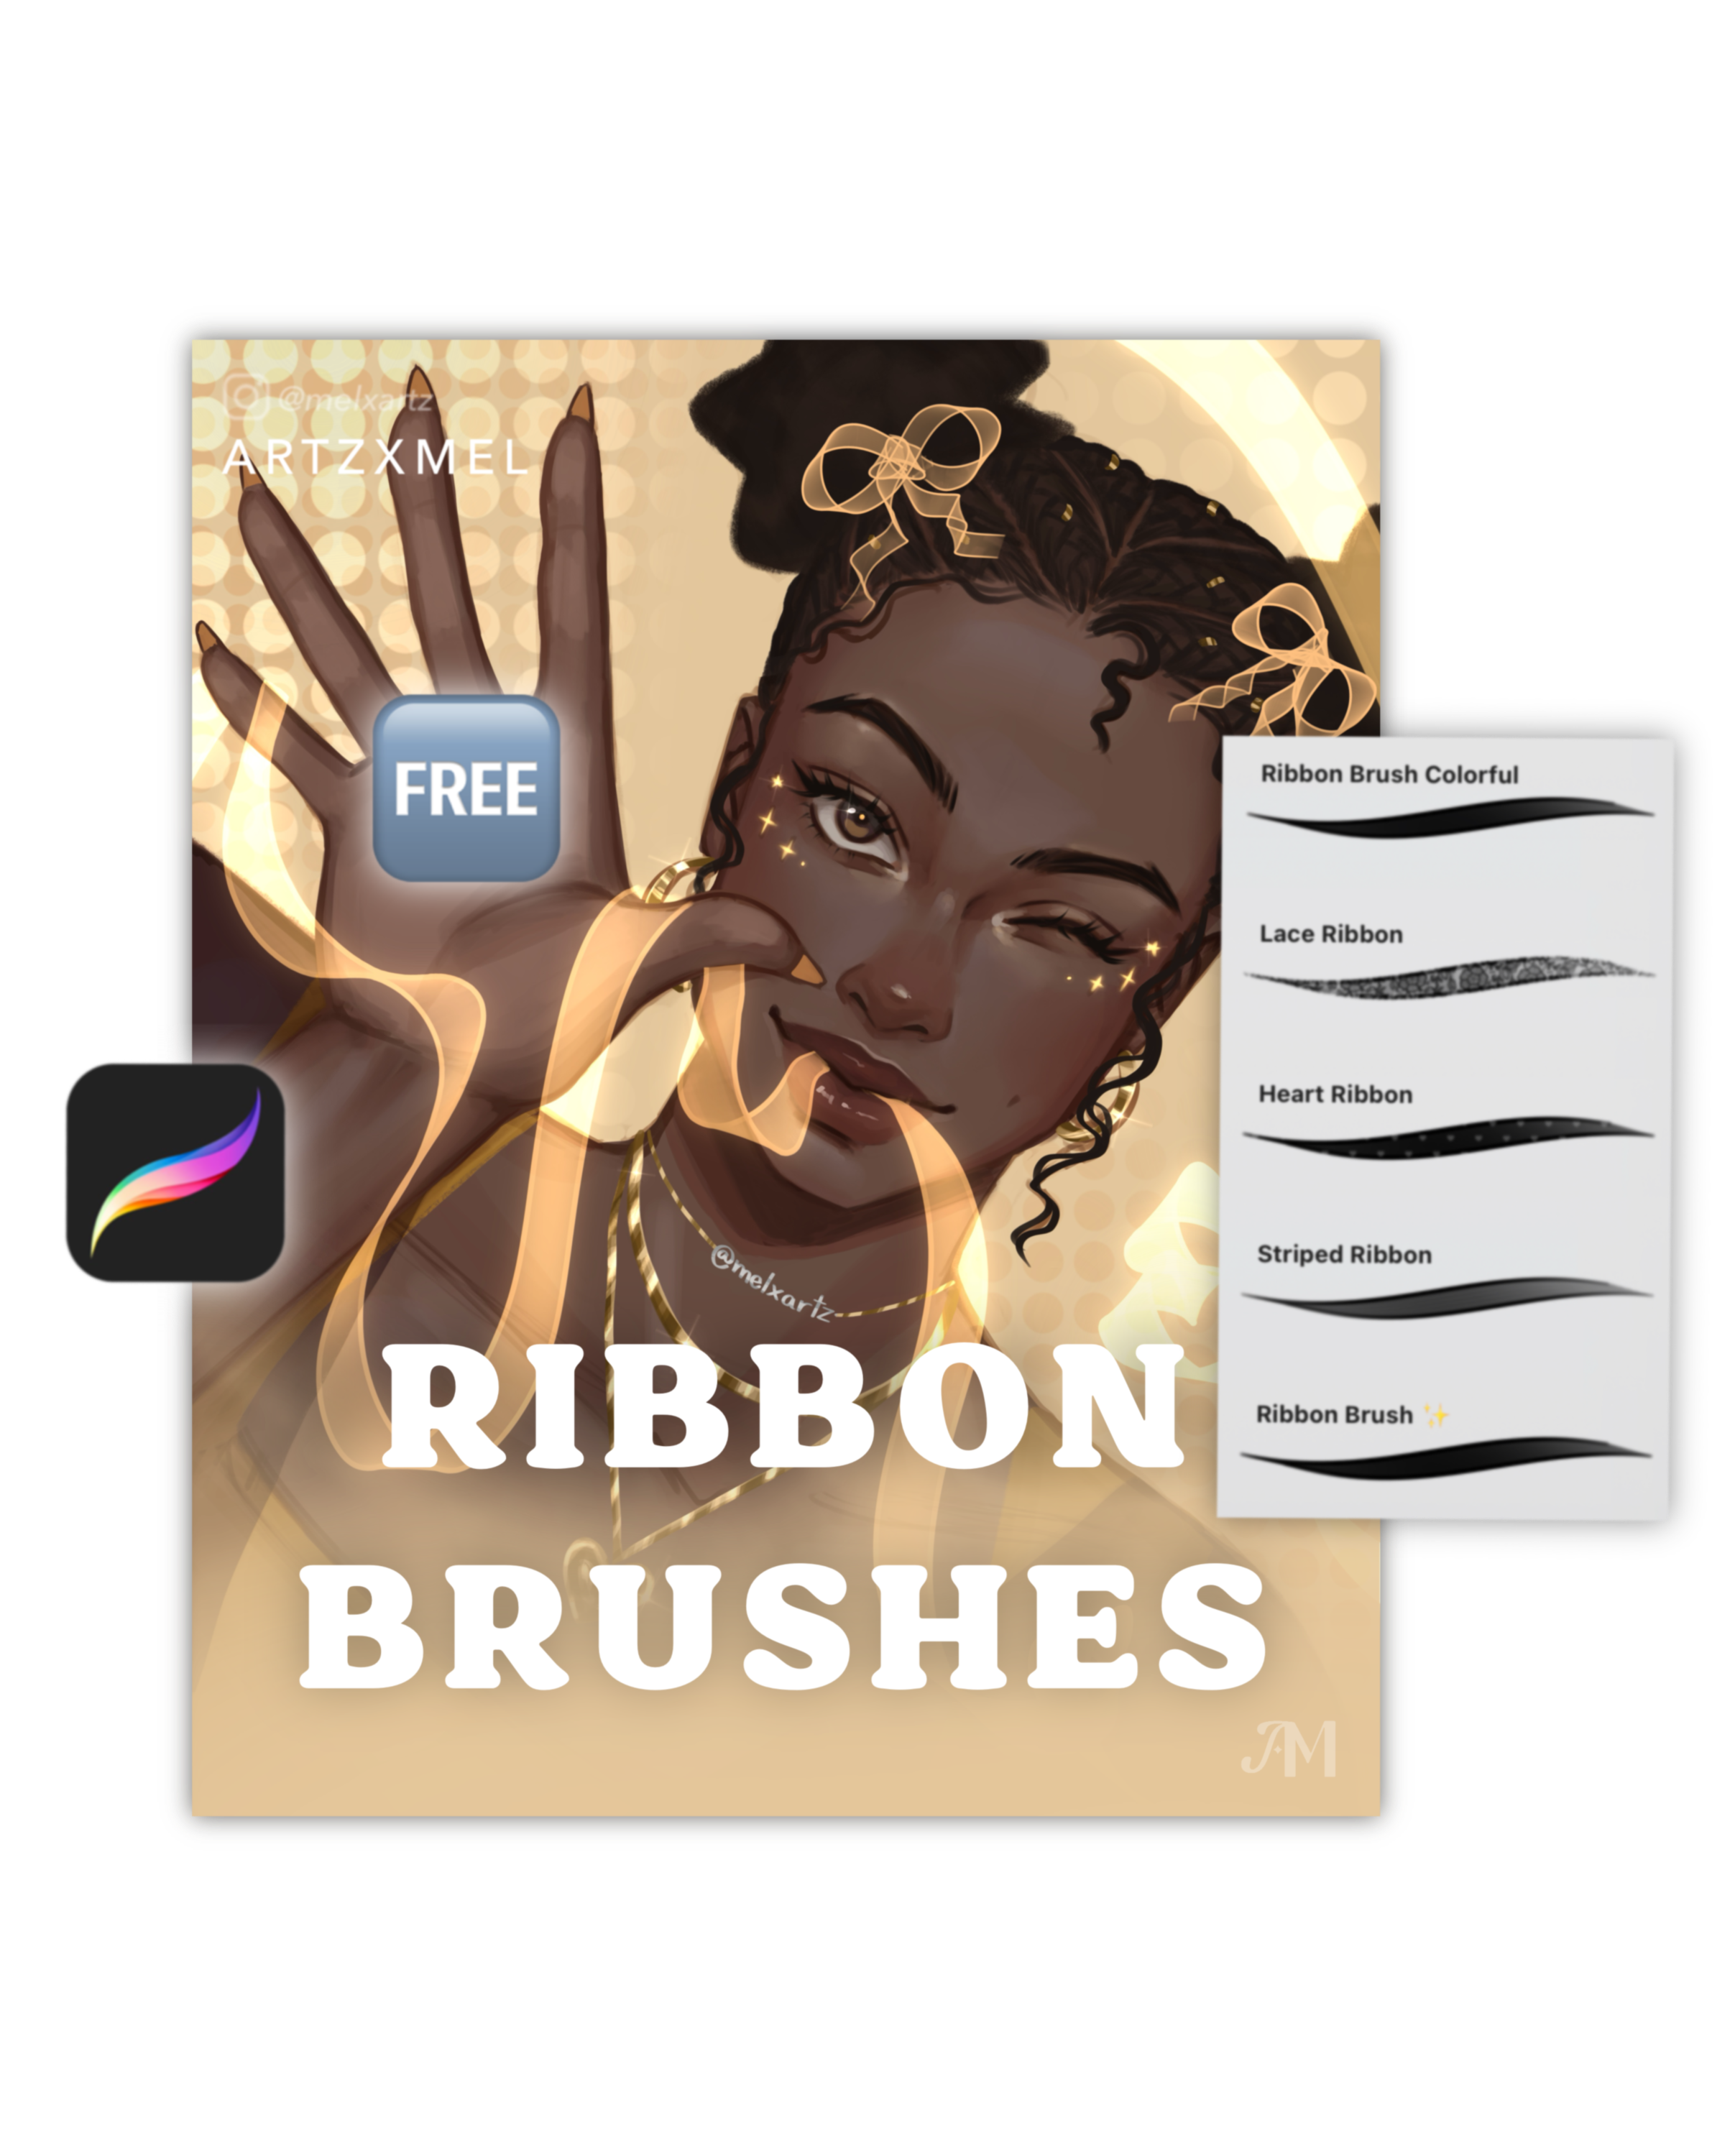
🖌️ Brushes used
Loose Sketch - Sketch Brush Set
Round Shading Brush - Rendering Brush Set
Smooth Hair Brush - Hair brush Set
Layer Breakdown Recap
Here’s a quick summary of what each layer does:
🌑 Multiply Layer – for soft shadows and depth.
🌤️ Hard Light Layer – for main sunlight, glowing hair, and environmental light.
🔆 Overlay Layer – for warmth and soft ambient glow.
💡 Quick recap
Start with your colored drawing as the base.
Use Multiply layer for shadows.
Hard Light for sunlight and hair glow.
Overlay for warmth.
Add extra details like soft reflections to the eyes for that extra ✨
If you want to see the full process, along with other lighting scenarios, watch my YouTube tutorial! You’ll see how I layer everything in real time and add lighting in Procreate.
Try it out and tag me if you give this a go — I’d love to see your version of backlit sunlight art!
Watch the full tutorial:
Subscribe to my email newsletter to receive your 5 free procreate brushes, plus occasional updates and resources from me!
Check Out My Latest Youtube Video!